Wondering how to make a reel on Instagram with photos?
You’re in the right place.
In this article, we’ll walk you through the step-by-step process of how to make an Instagram Reel with multiple photos.
Reels are a fun and engaging way to share your content with a wider audience on Instagram.
By utilizing your existing photo library, you can create a Reel that showcases your creativity and personality.
Whether you’re a business looking to promote your products or a personal brand looking to build your audience, making a Reel on Instagram with photos is a great way to do it.
So, let’s dive into how to make a reel on Instagram with photos!
- 1. Step 1: Prepare Your Photos
- 2. Step 2: Create Your Reel With Photos
- 3. Step 3: Share Your Reel With Photos
- 4. How To Make A Reel Using Canva
- 5. How To Promote A Reel On Instagram With Photos
- 6. Can You Do Reels With Photos?
- 7. Can You Make A Reel With Photos From Camera Roll?
- 8. How Many Photos Can You Add To A Reel?
- 9. Wrap Up
Step 1: Prepare Your Photos
Before you can start creating your Instagram Reel, you need to prepare your photos. This involves selecting the right photos and editing them to make them look their best.
1- Select Your Photos
The first step in preparing your photos is to select the ones you want to use in your Reel. You want to choose photos that are visually appealing and that tell a story.
Try to select photos that are related to each other in some way, whether it’s by theme, location, or subject matter.
When selecting your photos, keep in mind that Instagram Reels can be up to 90 seconds long, so you want to choose enough photos to fill that time without overwhelming your audience.
Aim for 15-20 photos for a 90-second Reel.
2- Edit Your Photos
Once you have selected your photos, it’s time to edit them.
Editing your photos can help to enhance their visual appeal and make them look more professional.
Here are some tips for editing your photos:
- Crop your photos to remove any unwanted elements and focus on the main subject.
- Adjust the brightness, contrast, and saturation to make your photos look more vibrant.
- Use filters to give your photos a consistent look and feel.
- Add text overlays to provide context or to add captions to your photos.
There are many photo editing apps available that can help you edit your photos. Some popular options include VSCO, Snapseed, and Adobe Lightroom.
Experiment with different editing techniques to find the ones that work best for your photos.
By selecting and editing your photos carefully, you can create an Instagram Reel that is visually appealing and engaging.
Step 2: Create Your Reel With Photos
If you want to make a reel on Instagram with photos, here’s how to do it.
1- Open The Instagram App
First, open the Instagram app on your mobile device. If you don’t have the app, download it from your app store and log in to your account.
2- Start A New Reel
To start a new reel, tap the plus (+) button on the bottom of the home screen. Then, select the Reels option.
Alternatively, you can also swipe right and choose the Reels tab to create Reels.
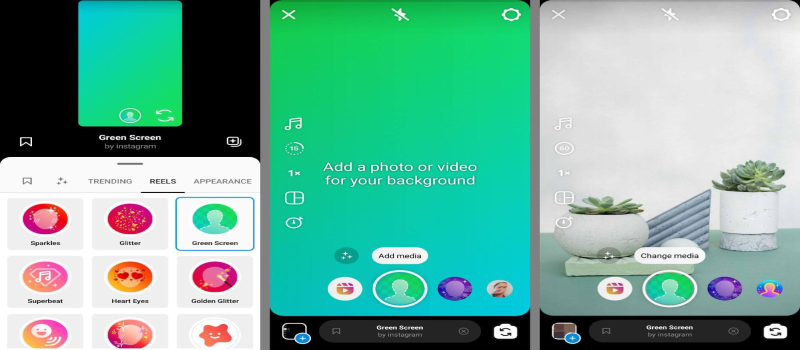
3- Add Your Photos
Once you have started a new reel, you can add your photos to it.
To do this, tap the image icon on the left-hand side panel. This will take you to your device’s gallery, where you can select the photos you want to add.
You can add multiple photos to your reel, and you can also rearrange the order of the photos by dragging and dropping them.
4- Edit Your Reel
After you have added your photos, you can edit your reel to make it more engaging and interesting.
Here are some editing options you can use:
- Add music: Tap the music note icon on the left-hand side to choose a song from Instagram’s library.
- Add text: Tap the text icon to add text to your reel. You can choose from different fonts and colors.
- Add stickers: Tap the sticker icon to add stickers to your reel. You can choose from a wide range of stickers, including emojis, GIFs, and more.
- Trim your photos: Tap the scissor icon to trim your photos to the desired length.
Congratulations, you have successfully created a reel on Instagram with photos!
Once you’ve created your reel, you’ll want to share it with your followers.
Here’s how to do it:
1- Add Captions And Hashtags
Before you share your reel, you’ll want to add captions and hashtags to make it more discoverable.
To do this, simply tap the caption field and type in your desired text. You can also add hashtags by including the “#” symbol followed by your desired keyword.
To make your captions and hashtags stand out, consider using emojis or formatting your text with bold or italicized fonts.
This can help draw attention to your reel and make it more engaging for viewers.
2- Share Your Reel
Once you’ve added your captions and hashtags, it’s time to share your reel.
To do this, simply tap the “Share” button. You’ll then be prompted to choose where you want to share your reel.
You can share your reel to your Instagram feed, your Instagram story, or even to Facebook. Simply select the desired option and follow the prompts to complete the sharing process.
How To Make A Reel Using Canva
If you want to make a reel on Instagram with photos, Canva is a great tool to use.
Here’s how you can do it:
- Log in to your Canva account and search for “Instagram Reels” in the search bar.
- Choose an Instagram Reel template that suits your needs and click on it.
- Upload the photos you want to use in your reel and drag them into the template.
- Add any text or graphics you want to include in your reel.
- Preview your reel to make sure everything looks good.
- Download your reel and upload it to Instagram.
Canva makes it easy to create professional-looking reels with photos. You can choose from a variety of templates and customize them to fit your needs.
How To Promote A Reel On Instagram With Photos
Here are some tips to effectively promote your brand on Instagram using Reels with photos:
- Pick a consistent theme for your Reels to increase brand recognition among your followers.
- Tailor the length of your Reels to your specific goals. Longer Reels between 30-90 seconds are better for conversions, while shorter ones of 3-15 seconds work well for gaining more views.
- Don’t be afraid to repost your Reels to give them another chance to catch your audience’s attention. Try experimenting with different hashtags, captions, and posting times.
- Share your Reels across other social media platforms and collaborate with other accounts to get your content out there.
- Use high-quality photos to create engaging Reels and grab your viewers’ attention.
- Keep an eye on your Reels analytics to track reach, engagement, and audience demographics. Use these insights to refine your promotion strategy for future Reels.
- Make sure your captions are catchy yet brief and contain relevant hashtags to increase visibility. Tag or mention relevant accounts to boost your reach.
- Use a mix of elements to create dynamic Reels, such as text overlays, voiceovers, interactive stickers, and music. This will help compensate for the lack of video in photo-only Reels.
Can You Do Reels With Photos?
Yes, you can make a Reel on Instagram with photos. In fact, using photos is a great way to create engaging and eye-catching Reels that can help you grow your audience and increase engagement on your profile.
To create a Reel with photos, you can follow the 3 steps outlined above in this article.
Can You Make A Reel With Photos From Camera Roll?
Yes, you can make a reel on Instagram with photos from your camera roll. This is a great option for those who have pre-existing content they want to use or those who prefer taking photos with a camera instead of the Instagram app.
How Many Photos Can You Add To A Reel?
You can add up to 30 photos to a Reel on Instagram.
This allows for a dynamic and engaging video that can showcase multiple images in a seamless manner.
It’s important to note that the duration of a Reel is limited to 90 seconds, so keep this in mind when selecting your photos and deciding how long to display each one.
With the ability to add up to 30 photos, you can create a visually stunning Reel that captures the attention of your audience and helps you stand out on Instagram.
Wrap Up
Congratulations! You have successfully learned how to make a Reel on Instagram with photos.
With the help of this guide, you can now create high-quality Reels that will help you engage with your audience and grow your Instagram following.
Experiment with different ideas, music, and filters to make your Reels stand out. Don’t be afraid to try new things and see what works best for you and your audience.